Example:
In this example we are going to create a schema named GlassDemo using the javadb or derby database which is shipped with GlassFish Application Server.
Go to GlassFish_Home/javadb/bin and click on ij.bat
An ij console will be opened.
Step1:
Starting the database
Go to asadmin utility and type the following command
asadmin> start-database --dbhost localhost --dbport 1527
Step2:
Creating a database. Open the ij console and type the following command.
connect ‘jdbc:derby:GlassDemo;create=true’;
Step3:
Connecting to the GlassDemo database:
connect ‘jdbc:derby:GlassDemo’;
Step4:
Create a table with name sample and insert values into it.
create table sample (usernam varchar(30), pass varchar(30));
insert into sample values (‘username’,’password’);
Step5:
Now from GlassFish_Home/javadb/bin copy the GlassDemo folder to GlassFish_Home/glassfish/databases folder
If databases folder is not present then create it and paste in it.
Step6:
Configuring the connection pool in Admin console
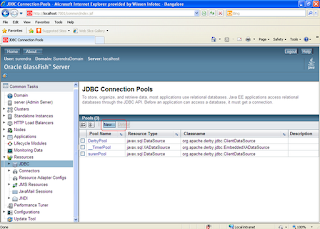
Click on JDBC and click JDBC Connection Pools
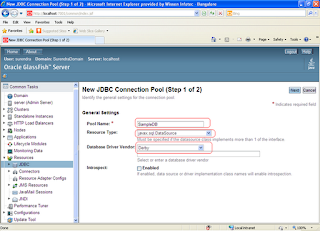
Click on the New button
Enter sampleDB as pool Name and select javax.sql.DataSource as resource type and select Derby as database driver vendor.
Enter GlassDemo for DatabaseName and APP for password.
If everything went ok you should see the above screen stating that ping succeeded.
Step7:
Click new JDBC Resources
Enter testmultidb for JNDI Name and select the sampleDB for Pool Name and select the server as target.
That’s it you are done..
Deploy the sample application (download) into admin server/server and test it by entering the username and password that you have entered in step4.
In this example we are going to create a schema named GlassDemo using the javadb or derby database which is shipped with GlassFish Application Server.
Go to GlassFish_Home/javadb/bin and click on ij.bat
An ij console will be opened.
Step1:
Starting the database
Go to asadmin utility and type the following command
asadmin> start-database --dbhost localhost --dbport 1527
Step2:
Creating a database. Open the ij console and type the following command.
connect ‘jdbc:derby:GlassDemo;create=true’;
Step3:
Connecting to the GlassDemo database:
connect ‘jdbc:derby:GlassDemo’;
Step4:
Create a table with name sample and insert values into it.
create table sample (usernam varchar(30), pass varchar(30));
insert into sample values (‘username’,’password’);
Step5:
Now from GlassFish_Home/javadb/bin copy the GlassDemo folder to GlassFish_Home/glassfish/databases folder
If databases folder is not present then create it and paste in it.
Step6:
Configuring the connection pool in Admin console
Click on JDBC and click JDBC Connection Pools
Click on the New button
Enter sampleDB as pool Name and select javax.sql.DataSource as resource type and select Derby as database driver vendor.
Make sure ping option is enabled.
Enter GlassDemo for DatabaseName and APP for password.
If everything went ok you should see the above screen stating that ping succeeded.
Step7:
Creating the JDBC Resources
Click on the JDBC ResourcesClick new JDBC Resources
Enter testmultidb for JNDI Name and select the sampleDB for Pool Name and select the server as target.
That’s it you are done..
Deploy the sample application (download) into admin server/server and test it by entering the username and password that you have entered in step4.


0 comments:
Post a Comment