Example:
In this example we are going to using the hypersonic database which is shipped with JBoss Application Server.
The database will start automatically when you start the JBoss server.
Step1:
Create a server configuration or instance with name hyper and configure the port sets as described above.
Start the server and open JMX Console.
Step2:
Type jboss and click on Apply Filter
Step3:
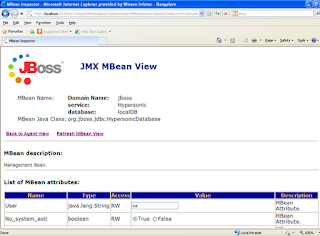
Click on database=localDB.service=Hypersonic
Search for the method void startDatabaseManager() and click invoke.
It will launch the hypersonic database console as shown below
Step4:
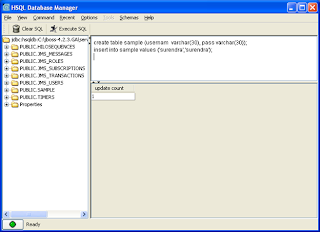
Create a table with name sample and insert values into it.
create table sample (usernam varchar(30), pass varchar(30));
insert into sample values (‘username’,’password’);
Click on the Execute SQL.
Step5:
Open hsqldb-ds.xml from following location.
JBOSS_HOME/server/hyper/deploy
Step6:
Uncomment the following code and save the file
That’s it you are done..
Deploy the sample application (download) and test it by entering the username and password that you have entered in step4.
You can access the application at http://localhost:8180/surenJDBC
How to connect with other database:
Same process applies to all databases (MYSQL, ORACLE, POINTBASE etc,.).
I will show how to connect with POINTBASE database.
Requirements:
POINTBASE database
pbclient.jar --This can be found in pointbase lib directory
Assumptions:
Database url: jdbc:pointbase:server://localhost:9092/surendraDB
Driver class: com.pointbase.jdbc.jdbcUniversalDriver
Step1:
Copy the pbclient.jar into server lib folder
JBOSS_HOME/server/hyper/lib
Step2:
Create a database with the name surendraDB
Create a table with the name sample.
create table sample (usernam varchar(30), pass varchar(30));
insert values into the table
insert into sample values (‘username’,’password’);
Step3:
Create an xml file with the name suren-ds.xml with the following contents
You can download the same form here
Replace the username and password with your database username and password.
That’s it you are done..


0 comments:
Post a Comment